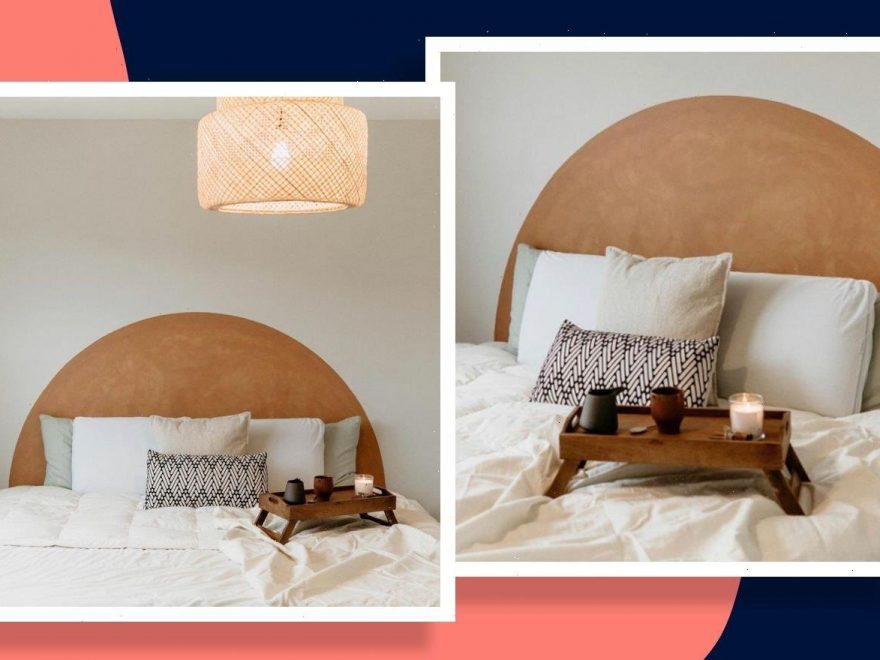
If you’re decorating your bedroom and you’re looking for ways to save space and money with minimal commitment, a DIY painted headboard could be just the thing for you. Here’s an expert guide on how to do it properly.
Welcome to The Curiosity Academy, Stylist’s new learning hub where you can access workshops, how-to guides, new research and learn the most up-to-date skills from the UK’s most in-the-know people.
Painting feature walls is becoming an increasingly popular way to freshen up your home over on Instagram, with influencers and interiors experts alike getting creative with trends like scalloped walls and arches. People are also discovering ways to use paint in place of furniture; perfect for commitment-phobes and those trying to save money while decorating their homes. One trend of this ilk is the painted headboard, which is a chic, unique alternative to the traditional fabric or wooden headboards.
“A painted headboard adds a visual focus to a bedroom, adding height and depth,” says Tash Bradley, head colour specialist at Lick Paint. “Because of this, it works really well in new builds or properties without period features.”
You may also like
How to paint Instagram’s scalloped wall trend, according to an expert
A painted headboard is traditionally circular and it works with any bed that doesn’t come with a built-in headboard. One of the best things about it is that you can choose any paint colour that you would like, so you can really make it work with your current interiors style, and you won’t be limited by colourways like with traditional headboards.
Here, Tash shares her tutorial and expert tips for nailing the painted headboard design, including how to perfect the circular shape and the best colours to choose for this particular design.
What you’ll need to create a DIY painted headboard
- Masking tape
- String
- Tape measure
- Nail
- Hammer
- Small paint roller
- Cutting in brush/small paint brush
- Paint colour of your choice
How to create a DIY painted headboard
- Measure your bed using a tape measure to find the centrepoint (lengthways and widthways) and make a mark on the wall behind it with a pencil.
- Hammer a nail to the centrepoint.
- Cut your string to the length you want your headboard to be, with an extra 2-3cm of length on top of that.
- Tie one end of the string to the nail and tie a pencil to the other end. If you don’t want to use a nail, you can tape your string to the centrepoint.
- Trace out a half circle using the nail and string to keep the shape steady and symmetrical.
- Take your cutting in brush and paint round the edges to create the outline of the circle
- Use your paint roller to fill in the middle of the circle.
Tash’s expert tips for creating a painted headboard
Think carefully about the size of your bed
The most important thing about your headboard is that it complements your bed. Before painting it, you could draw the headboard in the size you’re planning to choose with a pencil or take a photo of your room and edit the painted headboard in online, using a tool like Photoshop, to make sure you’re happy with how it looks.
“Some people like to make the painted headboard wider than their bed but I think it works best if you make it the exact size of your bed, so there are no corners sticking out,” Tash says. She adds that you need to make sure you’re precise with finding the centre of your bed so the headboard doesn’t look imbalanced.
Pick your colours wisely
You can choose whatever colour you would like for your painted headboard but Tash stresses that they look best against neutral wall colours like neutral tones or creams. “Avoid bright white as a backdrop as this can look garish,” she adds.
“My favourite colours to use for this design are always warm neutrals because I think they add a layer of sophistication,” Tash says. “I also like warmer colours like pink, reds and terracotta oranges.”
Precision is key
“Do not try to paint this design freehand without using string to draw your design,” Tash warns. “It will likely end up bothering you a lot if the circle isn’t equal.”
Using the string is the perfect way to help you keep your design precise and symmetrical. “If you do prefer more of a boho, rustic look, you can be less precise when painting over the pencil, making your edges less sharp,” Tash suggests.
Tash Bradley, head colour specialist at Lick Paint
Tash shares her tutorial for creating a painted headboard. Tash is the chief curator of the Lick colour palette and wallpaper collection and she’s helped more than 500 Lick customers transform their homes.
Images: Jessica Sellers, Tash Bradley
Source: Read Full Article
